Running Inspection Flows
Create inspection workflows to verify installed assets meet quality standards. Inspectors can flag issues, upload evidence photos, and approve installations on-site.
Before you start
- ✓A project with installed assets
Step 1 of 5
Open the Flows panel
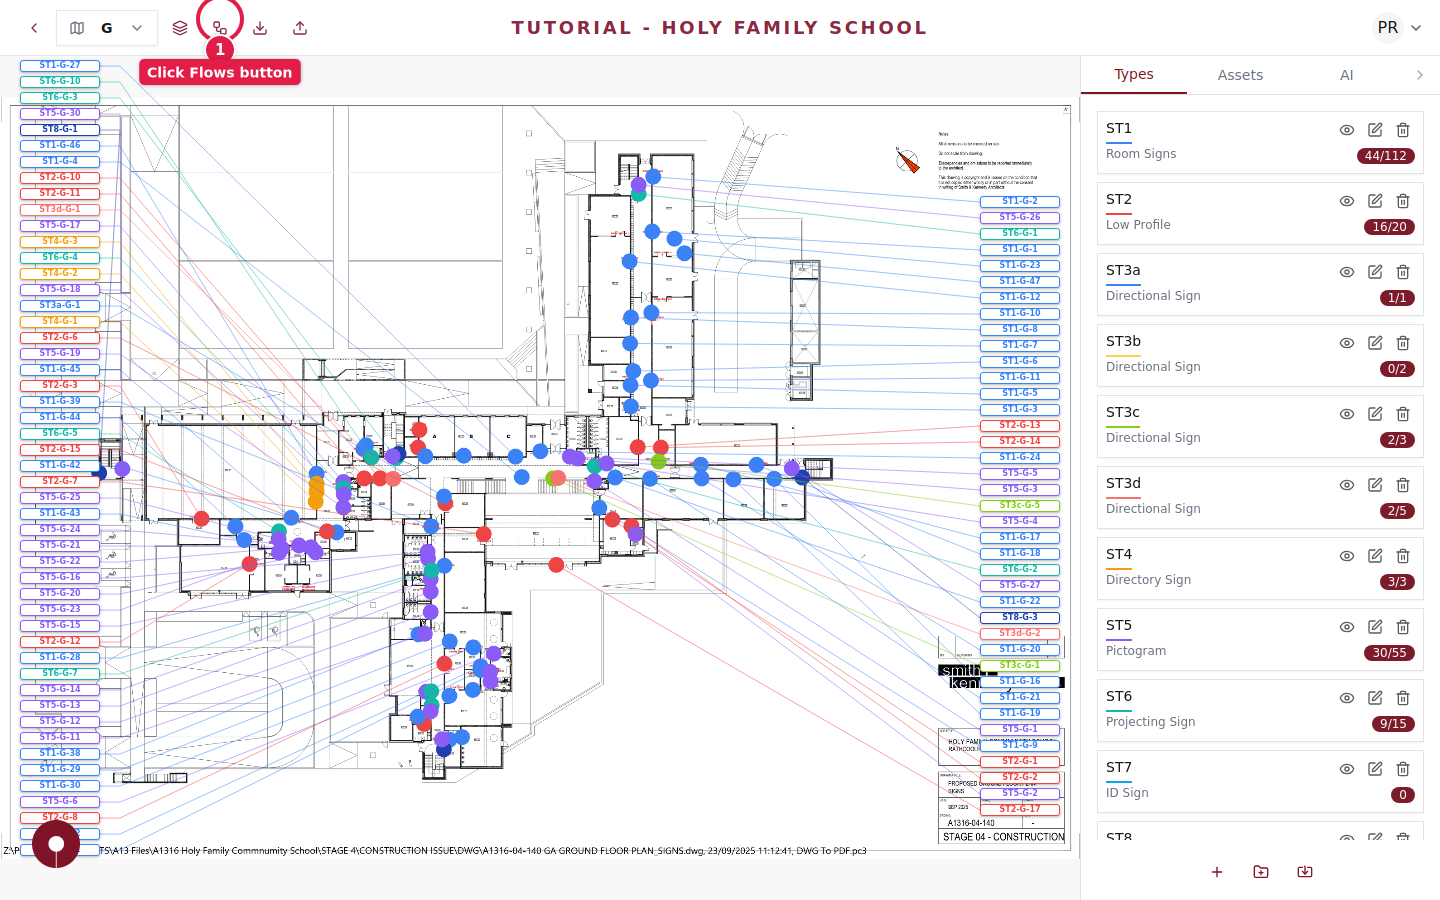
Navigate to your project floorplan and click the Approval & Installation Flows button in the top toolbar.
Step 2 of 5
Create an Inspection flow
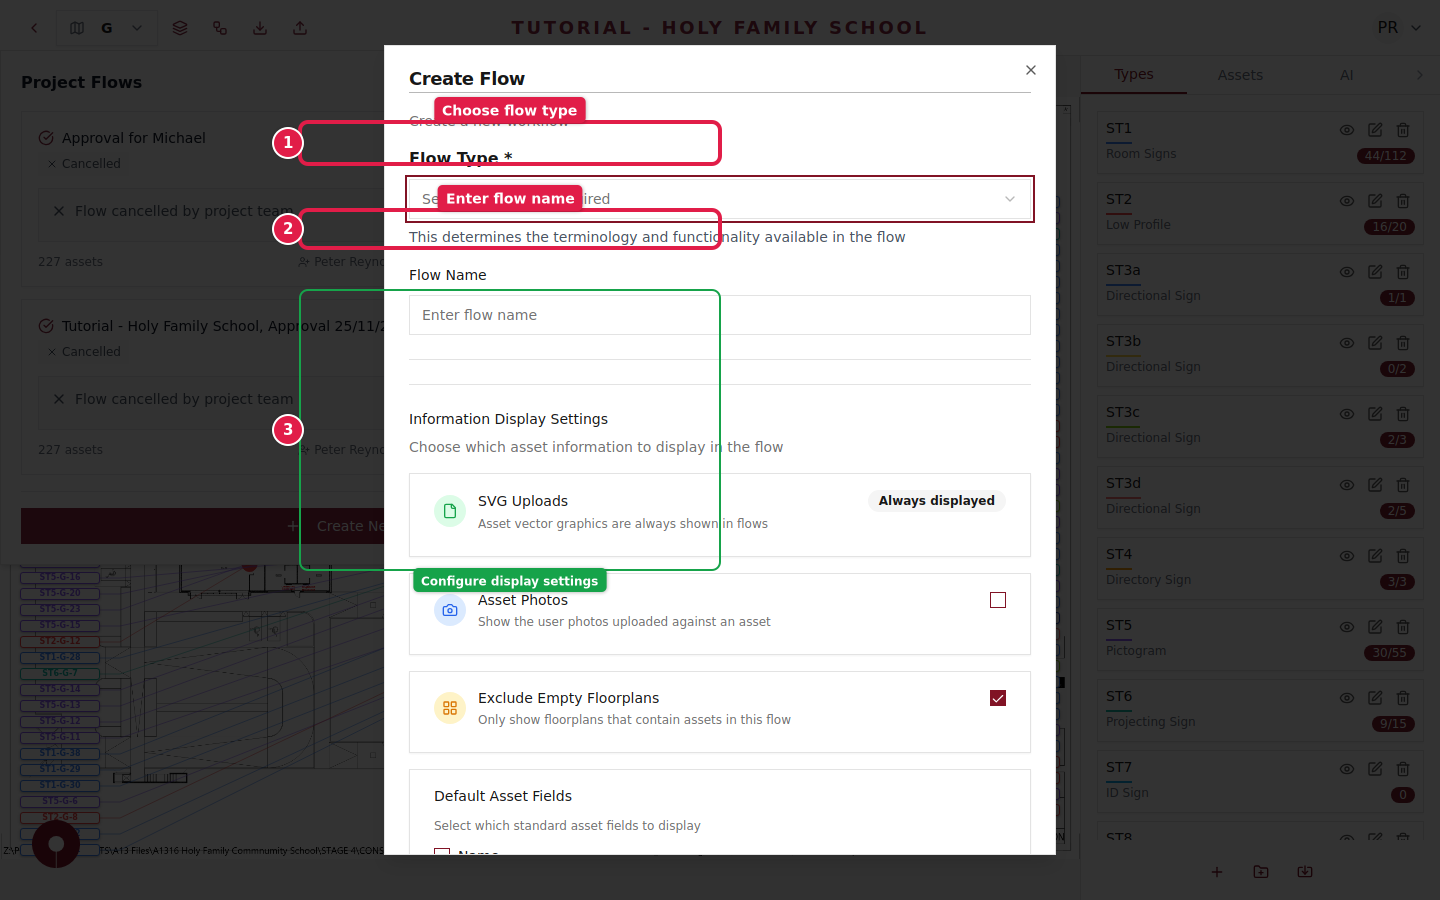
Click + Create New Flow and select Inspection as the flow type. Name it something descriptive like "Post-Installation Inspection Q1".
Step 3 of 5
Configure inspection settings
Set up what inspectors will see and can do:
- ✓SVG Uploads — Show the expected design for comparison
- ✓Asset Photos — Enable photo uploads so inspectors can document any issues
- ✓Default Asset Fields — Choose which fields inspectors need to verify
This ensures inspectors have all the context they need to verify each asset.
Include installation photos from the previous flow so inspectors can compare expected vs. actual results.
Step 4 of 5
Share with inspectors
Send the inspection flow link to your quality assurance team. They can walk through the building with the floorplan on their tablet, locating each asset and marking it as passed or flagging issues.
Step 5 of 5
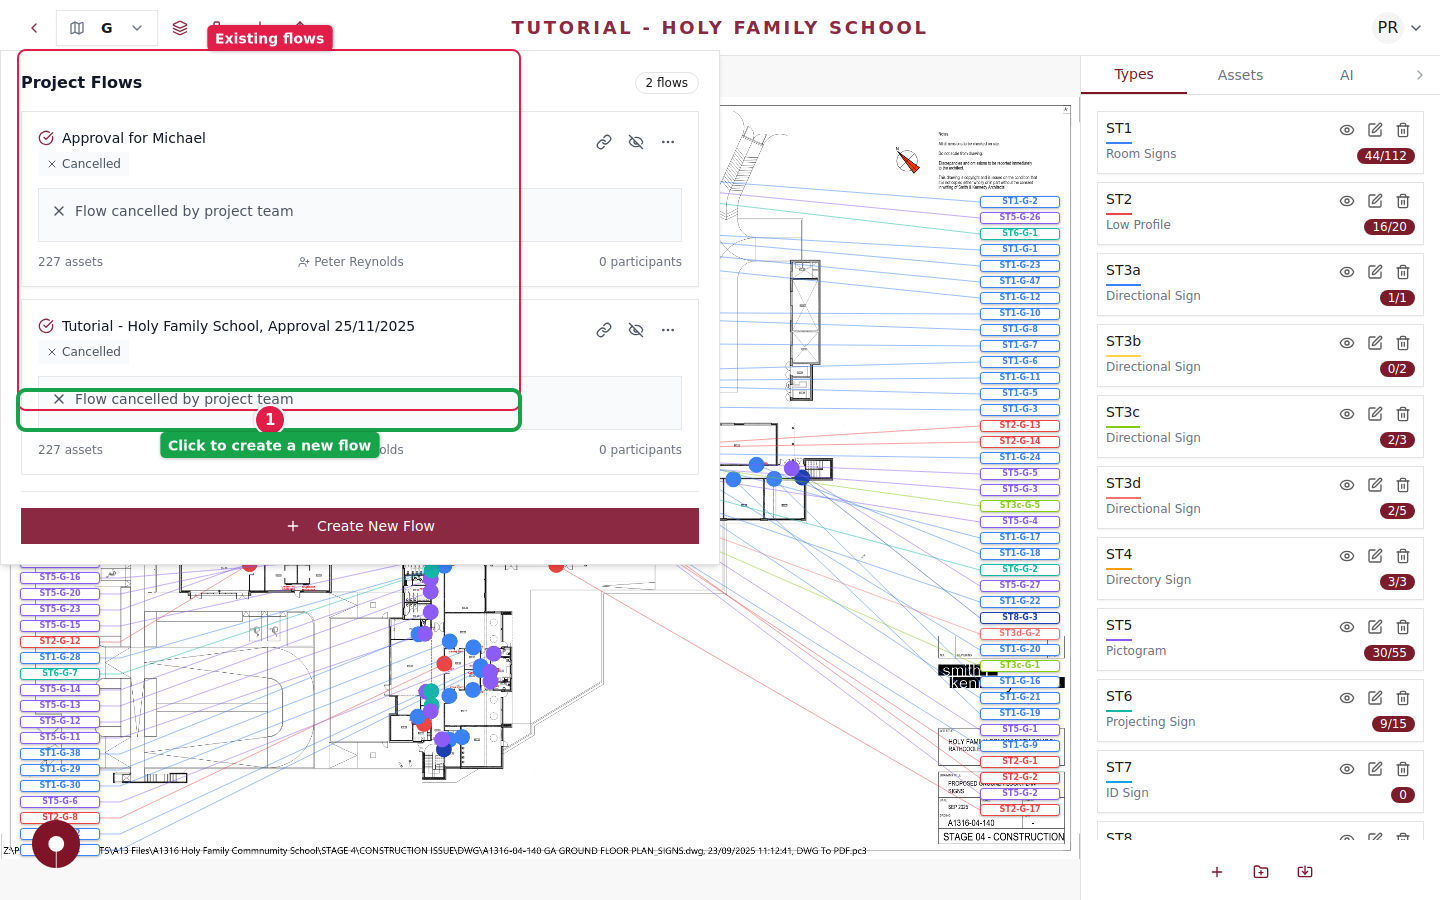
Review inspection results
Once inspections are complete, review the results from the flows panel. Any flagged assets will show their issues so you can take corrective action before closing out the project.
Export the inspection results as part of your project handover documentation.