Creating Assets and Placing Them on a Floorplan
Learn how to create asset types, open a floorplan, and place assets exactly where they belong. This step-by-step guide walks you through the complete workflow from login to a fully mapped floorplan.
Before you start
- ✓A Plotstuff account (or use "Try It Now" to follow along)
- ✓At least one project with an uploaded floorplan
Step 1 of 8
Sign in to your account
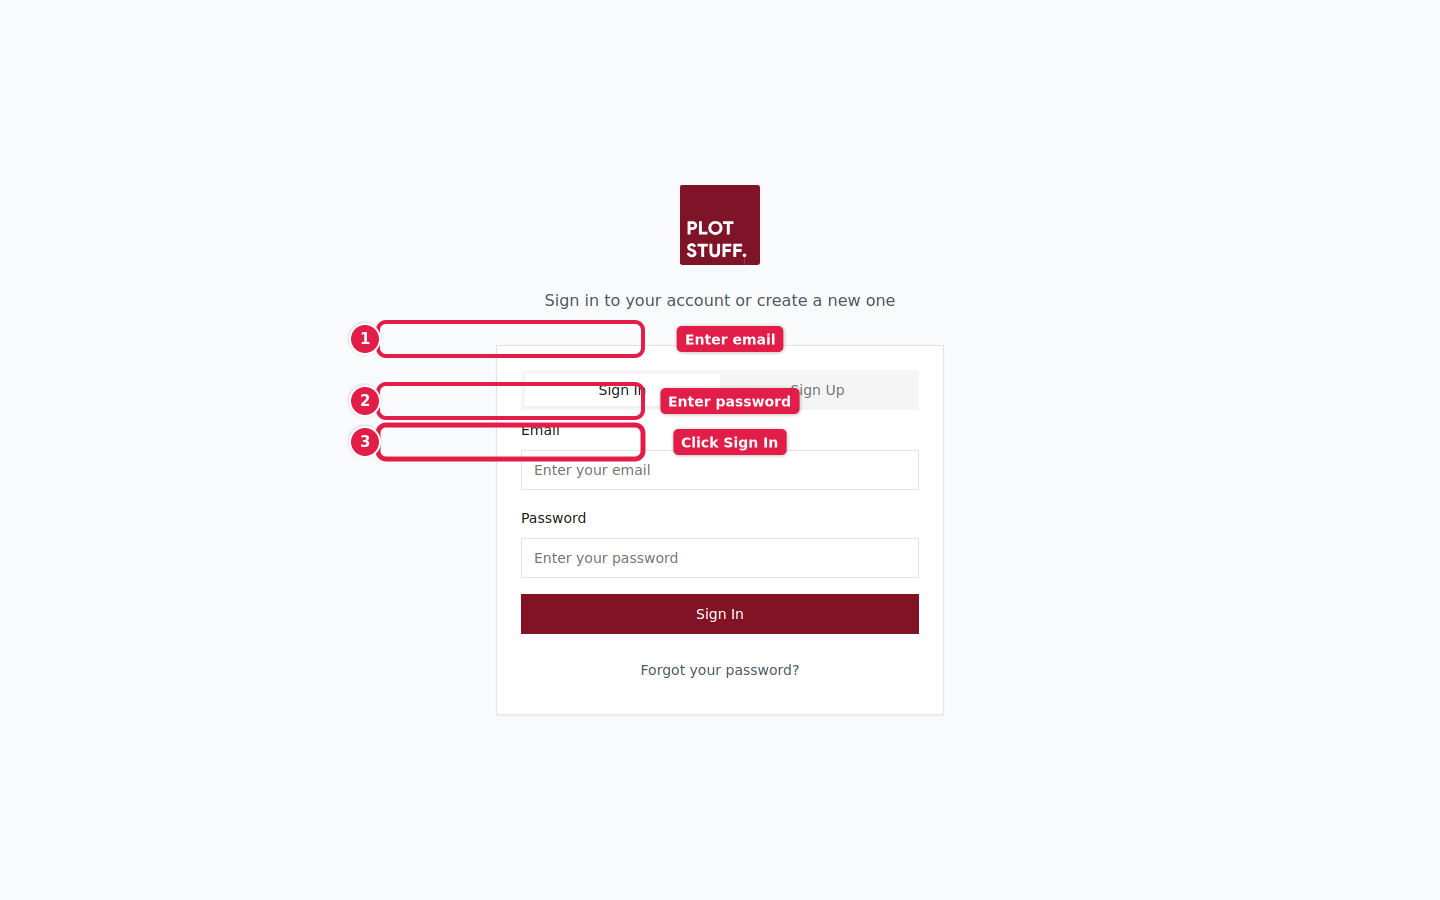
Go to Plotstuff and sign in with your email and password. If you don't have an account yet, click Sign Up to create one, or use the Try It Now button on the homepage to explore with a demo project.
Step 2 of 8
Open your project
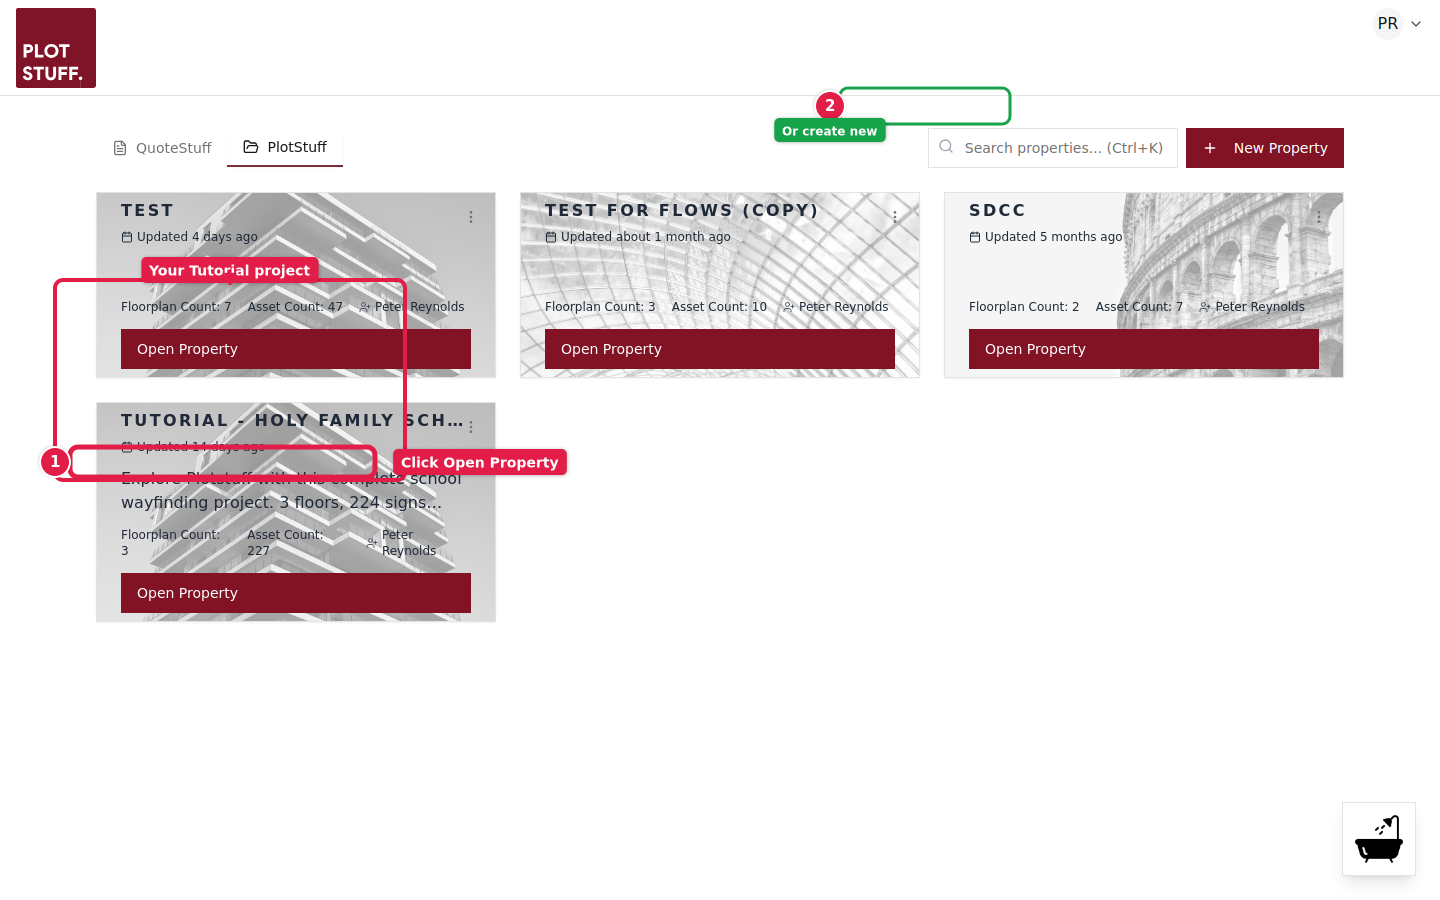
After signing in, you'll see your dashboard with all your projects listed as cards. Each card shows the project name, number of floorplans, and total assets. Click Open Property on the project you want to work with.
You can also create a new project by clicking the + New Property button in the top right corner.
Step 3 of 8
Go to the Asset Types tab
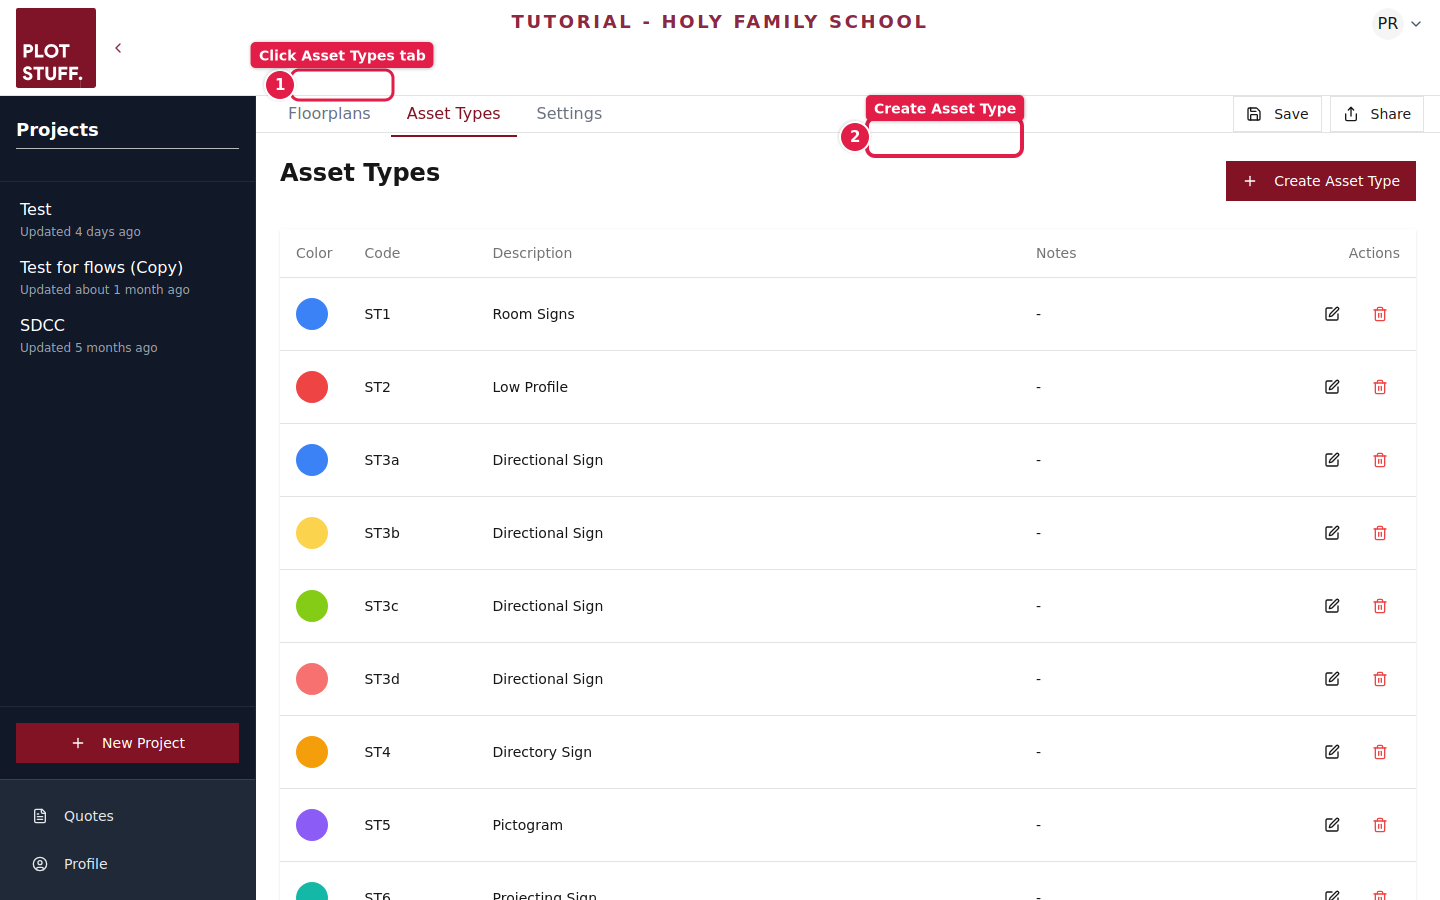
Inside your project, you'll see three tabs at the top: Floorplans, Asset Types, and Settings. Click the Asset Types tab to view and manage the types of assets you can place on your floorplans.
Step 4 of 8
Create a new asset type
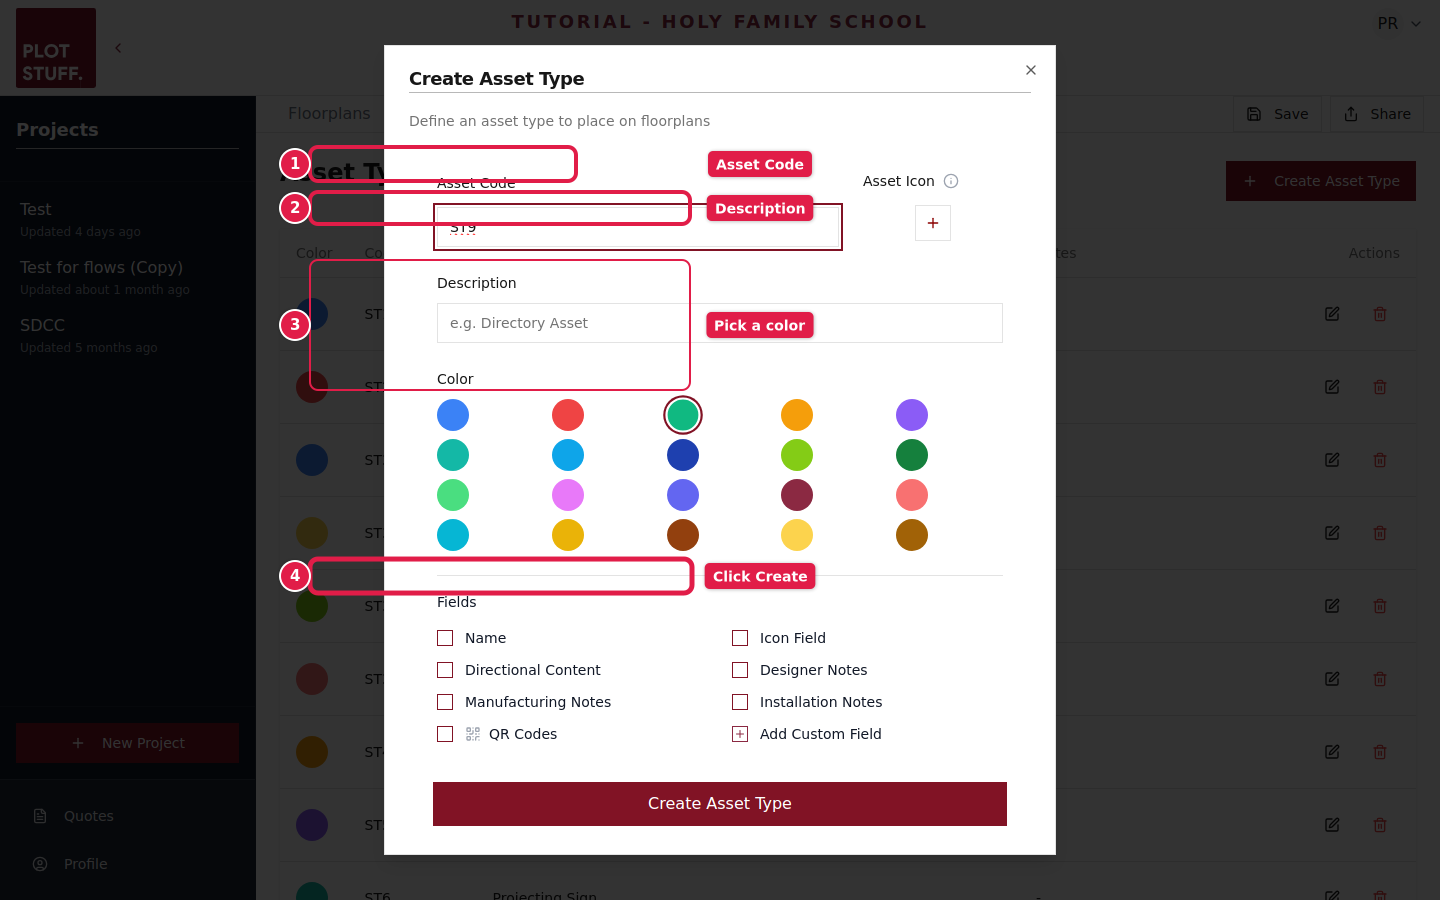
Click the + Create Asset Type button. In the dialog that appears, fill in:
- 1Asset Code — A short identifier like ST1, DS2, or WS3
- 2Description — What this asset type represents (e.g. "Room Sign", "Directory Sign")
- 3Color — Pick a color to visually distinguish this type on the floorplan
- 4Click Create Asset Type to save
You can enable optional fields like Name, Directional Content, QR Codes, and custom fields to capture extra detail about each asset.
Step 5 of 8
Open a floorplan
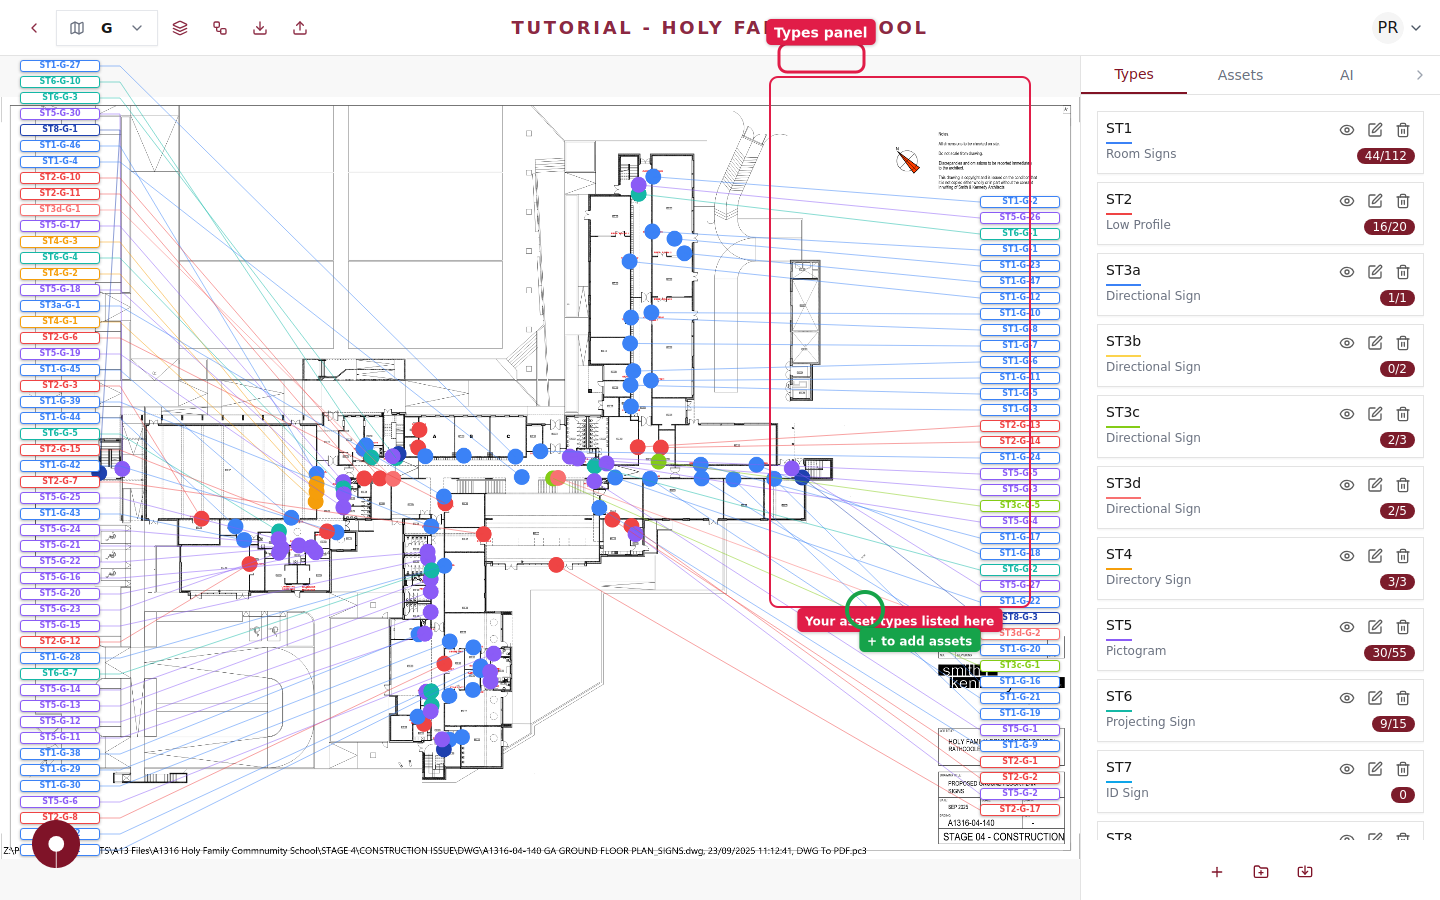
Switch back to the Floorplans tab and click on a floorplan to open it. The floorplan viewer shows your architectural drawing with a Types panel on the right side listing all your asset types with their color-coded indicators and placement counts.
Step 6 of 8
Place an asset on the floorplan
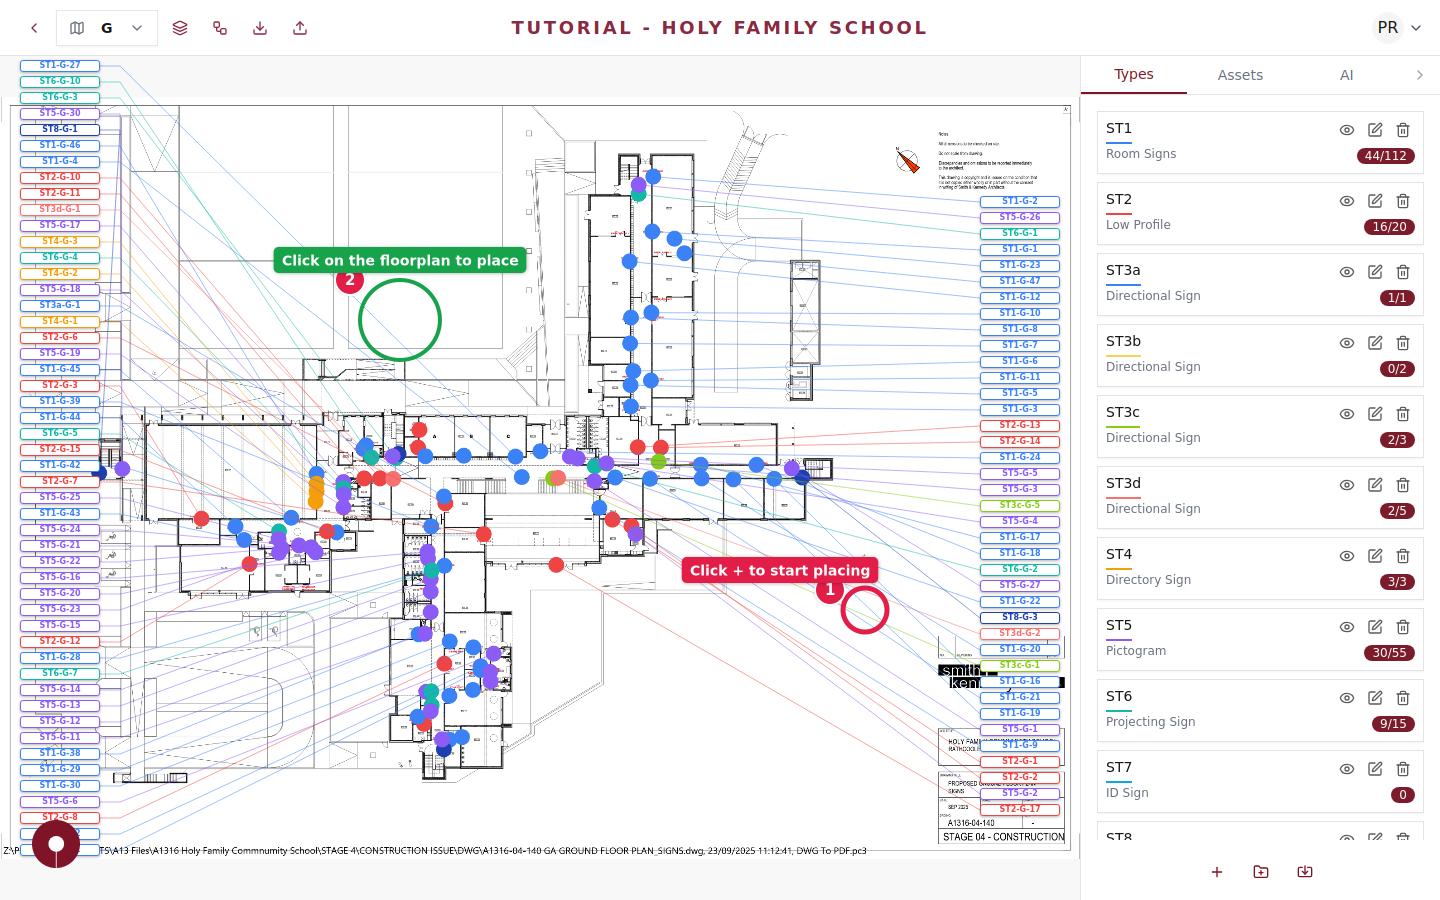
To add a new asset, click the + button in the bottom-right toolbar. This enters placement mode. Then simply click anywhere on the floorplan where you want to position the asset. A colored marker will appear at that location.
You can drag placed assets to reposition them at any time. The asset marker color matches the asset type's color.
Step 7 of 8
View your placed assets
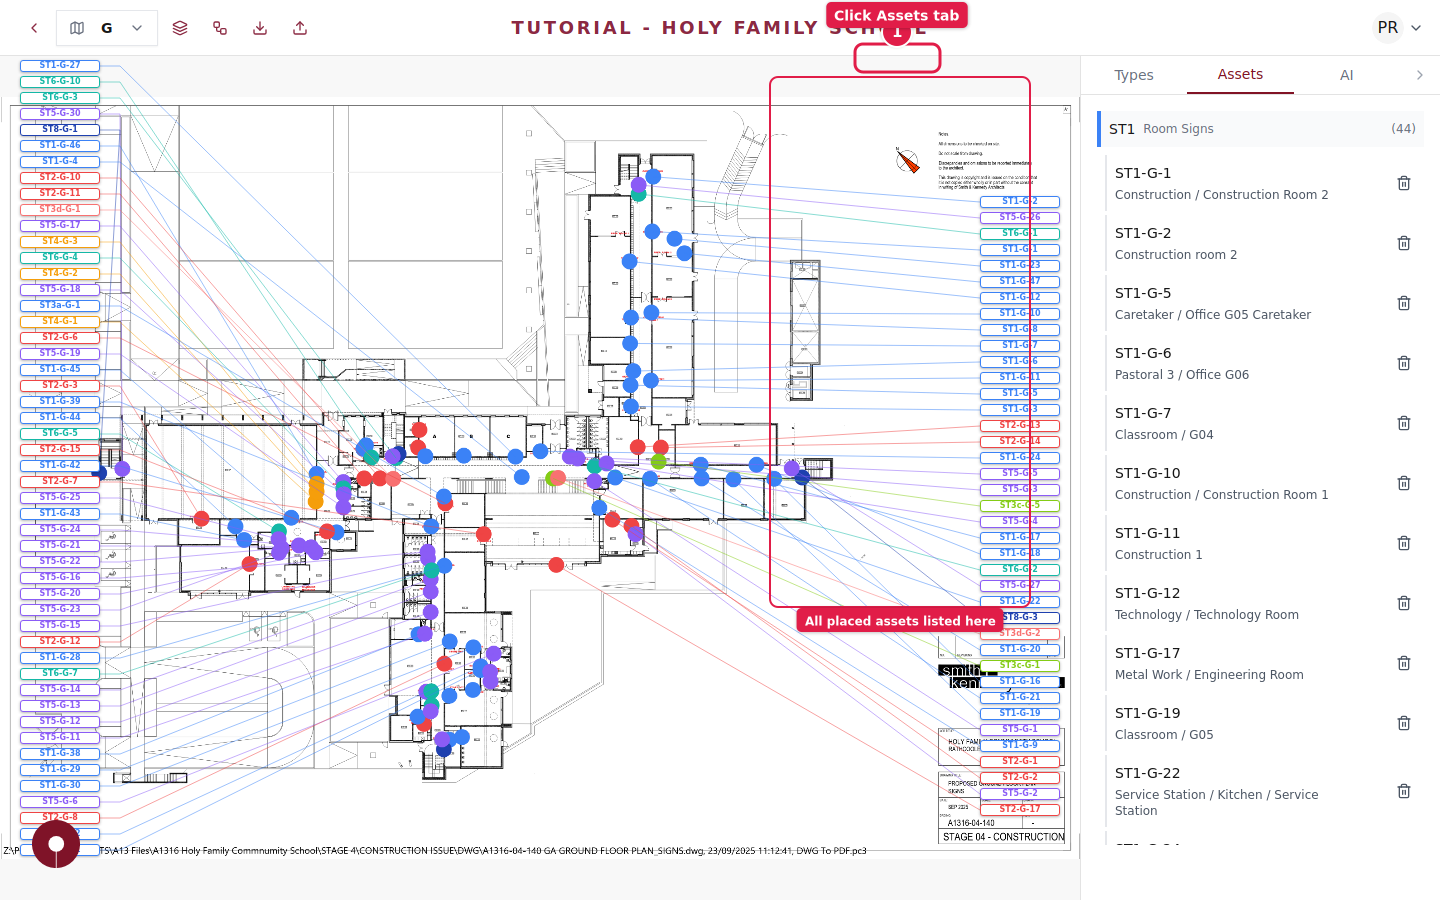
Click the Assets tab in the right panel to see a full list of every asset placed on this floorplan. Assets are grouped by type, and each one shows its unique reference code (e.g. ST1-G-1). Click any asset in the list to highlight it on the floorplan.
Step 8 of 8
You're all set!
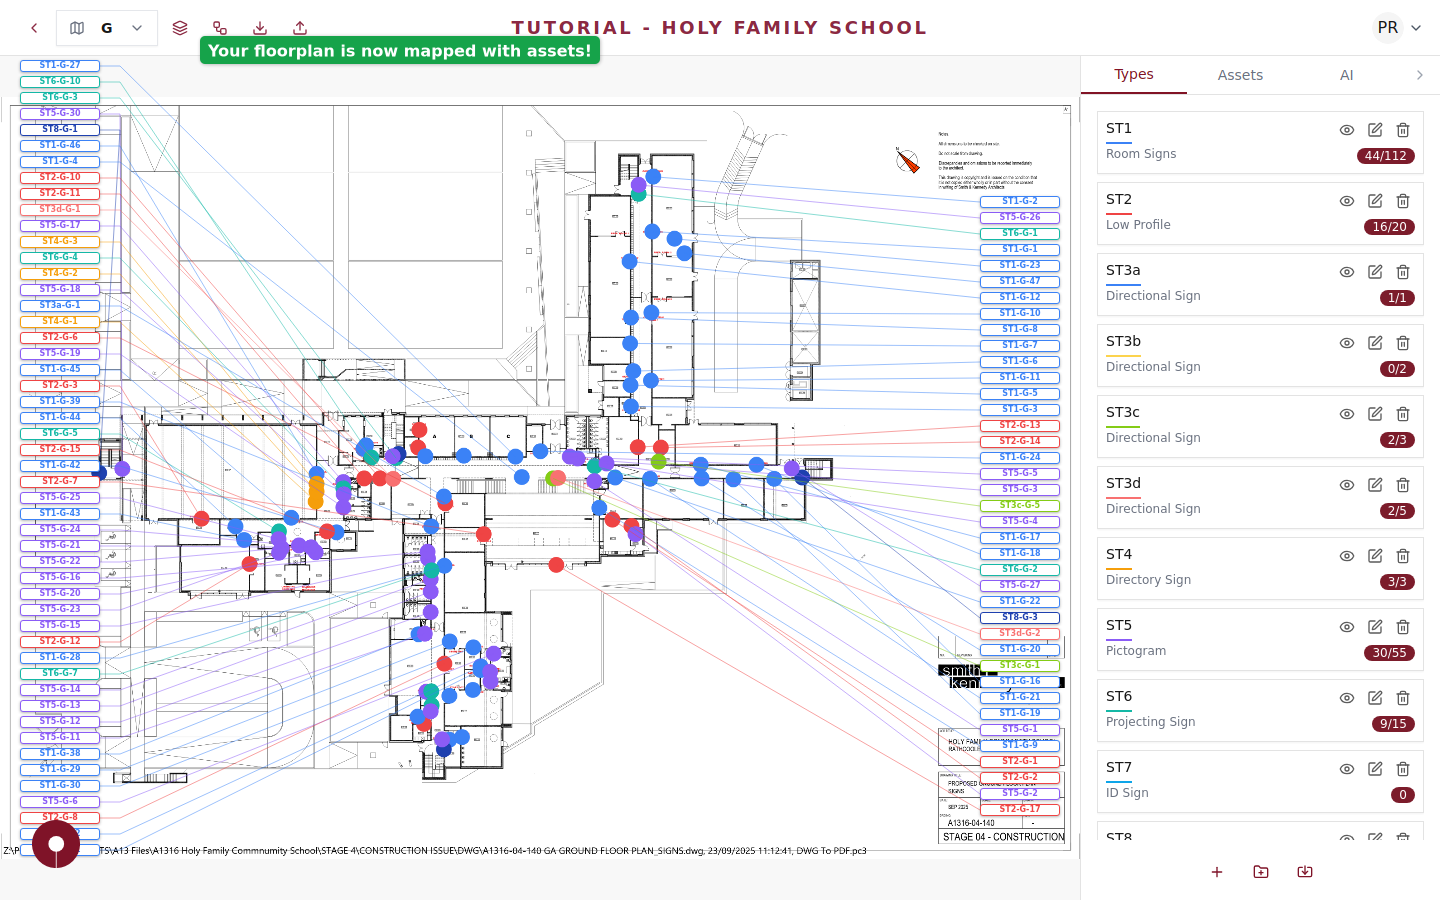
Your assets are now placed on the floorplan and ready for the next steps. From here you can:
- ✓Create approval flows to get stakeholder sign-off
- ✓Export reports with asset schedules and floorplan PDFs
- ✓Upload SVG artwork for production-ready visuals
- ✓Generate production artwork using the visual template editor